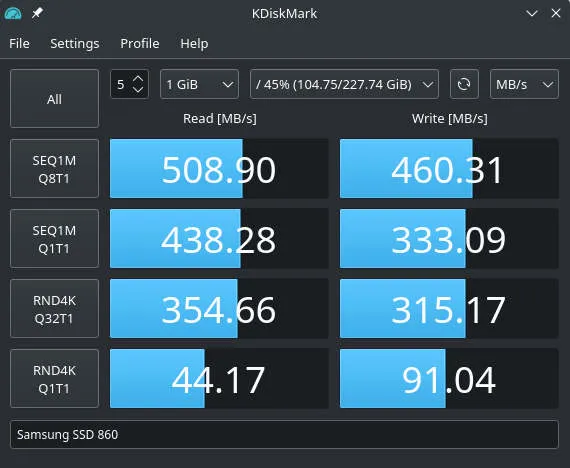
Testing disk performance is a crucial task when evaluating new hardware or troubleshooting storage bottlenecks. Under Windows, CrystalDiskMark is the go-to utility for drive benchmarking, providing sequential and random read/write speeds in a simple, friendly interface.
For a long time, I had to reboot my Linux system into Windows just to test my disks with CrystalDiskMark. To avoid this frustration, I set out to find a native alternative. That is when I found KDiskMark, a simple and powerful open-source benchmark tool for Linux distros.
KDiskMark acts as a GUI frontend for the industry-standard fio (Flexible I/O Tester). It handles the complex parameters under the hood and presents the benchmark results in a clean window that is remarkably similar to CrystalDiskMark. The application is written in C++ with Qt, has various performance profiles, and does not have any KDE dependencies, making it perfect for any desktop environment.
Here is a step-by-step guide on how to prepare your Linux system, compile KDiskMark, and how to uninstall it later if needed.
Preparing Your Linux System (Dependencies)
To compile KDiskMark, you must first install the compilation tools, Qt development packages, fio, and the libaio development package.
Debian / Ubuntu and derivatives (Linux Mint, Pop!_OS, etc.)
sudo apt install build-essential cmake git extra-cmake-modules qt6-base-dev qt6-tools-dev qt6-tools-dev-tools libpolkit-qt6-1-dev fio libaio-devFedora and derivatives (Nobara, etc.)
sudo dnf install cmake git extra-cmake-modules qt6-qtbase-devel qt6-qttools-devel polkit-qt6-1-devel fio libaio-develArch Linux and derivatives (Manjaro, EndeavourOS, CachyOS, etc.)
sudo pacman -Syu base-devel cmake extra-cmake-modules polkit-qt6 fio libaioCompiling and Installing KDiskMark
With the preparation complete, follow these steps to clone the repository and build the package:
1. Clone the repository
Clone the official repository from GitHub and navigate into the folder:
git clone https://github.com/JonMagon/KDiskMark.git && cd KDiskMark2. Create and enter a build directory
Always perform an out-of-source build with CMake:
mkdir build && cd build3. Configure the project with CMake
Configure KDiskMark using CMake. By default, KDiskMark compiles with Qt6. If you are on an older system and prefer Qt5, you can pass -DUSE_QT5=ON instead:
cmake -DCMAKE_BUILD_TYPE=Release ..4. Compile the project
Compile using all available CPU cores:
make -j$(nproc)5. Install KDiskMark
To install it system-wide so it appears in your application menu, run:
sudo make installHow to Uninstall KDiskMark
If you ever need to uninstall KDiskMark, navigate back to your build directory and run the following command to remove all installed files:
sudo xargs rm < install_manifest.txt[!NOTE] The
install_manifest.txtfile is generated automatically when you runsudo make install. If you have already deleted the build directory, you can regenerate it by cloning the repo, running thecmakeconfiguration again, and then executing the uninstall command.
Source Code & Repository
To view the source code, open issues, or contribute to KDiskMark, check out the official GitHub repository:
- Source: JonMagon/KDiskMark on GitHub