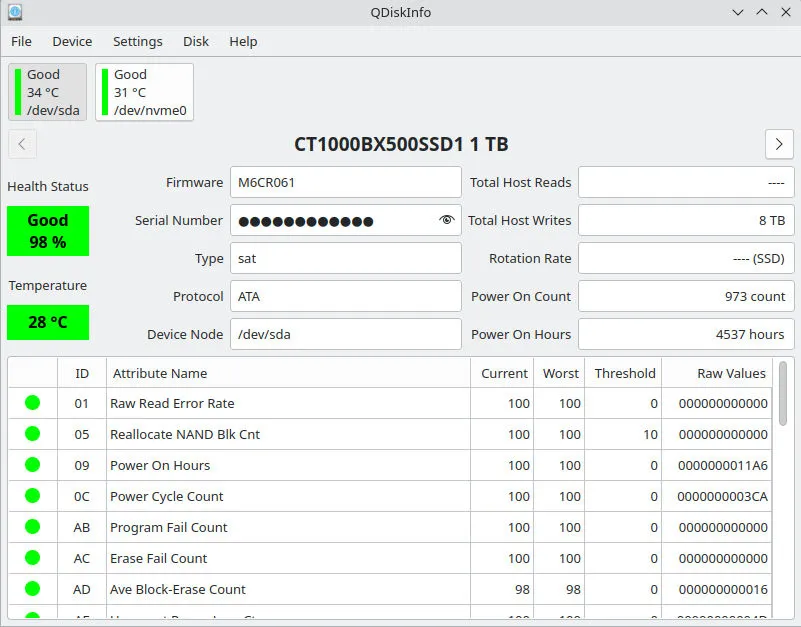
For a long time, one of the few things that forced me to reboot my Linux system into Windows was drive diagnostics. CrystalDiskInfo is quite used for checking HDD and SSD health, displaying temperature, health status, and full SMART parameters in a simple, readable GUI.
I wanted a true CrystalDiskInfo alternative for Linux to avoid rebooting just to test my disks. That is when I found QDiskInfo, a fantastic Qt-based frontend for smartctl (part of the smartmontools package) that provides a user experience remarkably similar to CrystalDiskInfo. It lets you monitor your SSDs/HDDs, check temperature, and inspect SMART parameters natively on Linux.
Here is a step-by-step guide on how to prepare your Linux system, compile QDiskInfo from source, and how to uninstall it if needed.
Preparing Your Linux System (Dependencies)
Before compiling, you need to install the required build tools, Qt6 development libraries, and smartmontools. Depending on your distribution, run the appropriate command below:
Debian / Ubuntu and derivatives (Linux Mint, Pop!_OS, etc.)
sudo apt install build-essential cmake git libgl1-mesa-dev libxkbcommon-dev qt6-base-dev qt6-tools-dev qt6-tools-dev-tools qt6-wayland smartmontoolsFedora and derivatives (Nobara, etc.)
sudo dnf install cmake git mesa-libGL-devel libxkbcommon-devel qt6-qtbase-devel qt6-qttools-devel qt6-qtwayland-devel smartmontoolsArch Linux and derivatives (Manjaro, EndeavourOS, CachyOS, etc.)
sudo pacman -Syu base-devel cmake hicolor-icon-theme polkit qt6-base qt6-svg smartmontoolsCompiling and Installing QDiskInfo
Once the dependencies are installed, follow these steps to clone the repository, configure the build with CMake, and compile:
1. Clone the repository
Clone the repository from GitHub and navigate into the folder:
git clone https://github.com/edisionnano/QDiskInfo.git && cd QDiskInfo2. Create and enter a build directory
It is best practice to perform an out-of-source build:
mkdir build && cd build3. Configure the build with CMake
Configure the project specifying build optimizations and enabling translations. By default, QDiskInfo uses Qt6:
cmake .. -DCMAKE_BUILD_TYPE:STRING=MinSizeRel -DQT_VERSION_MAJOR=6 -DENABLE_TRANSLATIONS=ON4. Compile the project
Compile using all available CPU threads:
make -j$(nproc)This creates the QDiskInfo executable in your current build folder.
5. Install QDiskInfo
To install it system-wide so it appears in your application menu, run:
sudo make installHow to Uninstall QDiskInfo
If you ever need to uninstall QDiskInfo from your system, you can easily remove all installed files using the generated install_manifest.txt file. Navigate to your build directory and run:
sudo xargs rm < install_manifest.txt[!NOTE] The
install_manifest.txtfile is generated automatically duringsudo make install. If you have deleted the build folder, simply clone the repository again, recreate the build folder, run thecmakeconfiguration, and the manifest file will be regenerated.
Source Code & Repository
For more details, updates, or to contribute to the project, visit the official repository:
- Source: edisionnano/QDiskInfo on GitHub